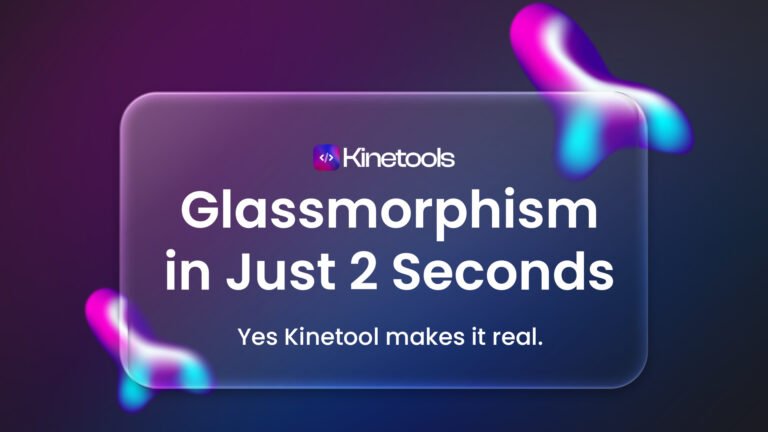
How to Create Modern UI with Glassmorphism Effects The digital design landscape has evolved dramatically, and one trend continues to captivate designers and developers worldwide: glassmorphism effects. This stunning design aesthetic creates a frosted glass appearance that adds depth, sophistication, and visual hierarchy to modern interfaces.
However, here’s the challenge most designers face: creating perfect glassmorphism effects traditionally requires writing complex CSS code, adjusting multiple properties, refreshing browsers frequently, and spending hours fine-tuning values. What if there was a better way?
In this comprehensive guide, you’ll discover not only the theory behind glassmorphism but also how modern tools like KineTools Glassmorphism Generator are revolutionizing the design workflow — letting you create professional glass effects in seconds, not hours.
What Are Glassmorphism Effects and Why Do They Matter?
Glassmorphism is a contemporary UI design trend that mimics the appearance of frosted or etched glass. This effect combines several key visual properties: background blur (backdrop filter), transparency, vibrant colors, and subtle borders. The result is a translucent, layered interface that creates visual depth while maintaining excellent content readability.
The Modern UI with Glassmorphism Effects gained massive popularity in 2020 and has since become a staple in modern design systems. Major brands like Apple, Microsoft, and numerous tech startups have embraced this aesthetic for its ability to create visually stunning yet functional interfaces.
The Psychology Behind Frosted Glass Effect Design
Why do glassmorphism effects work so well? The answer lies in visual perception. Our brains interpret layered transparency as depth, creating a three-dimensional feel on flat screens. This depth perception helps users understand interface hierarchy intuitively, improving navigation and overall user experience.
The frosted glass effect also adds a premium, modern feel to digital products. Users associate transparency and blur effects with sophistication and quality, which can significantly impact brand perception and user trust.
The Traditional Way: Creating Glassmorphism with Manual Coding
Let’s first understand how glassmorphism was traditionally created — so you can appreciate why modern tools like KineTools are game-changers.
The Old Method: Writing CSS from Scratch
Designers used to spend hours writing and adjusting CSS properties manually:
css.glass-card { background: rgba(255, 255, 255, 0.15); backdrop-filter: blur(10px); -webkit-backdrop-filter: blur(10px); border-radius: 16px; border: 1px solid rgba(255, 255, 255, 0.3); padding: 40px; box-shadow: 0 8px 32px rgba(0, 0, 0, 0.1); }The problems with this approach:
- Time-consuming: Adjusting each property means editing code, saving files, and refreshing browsers repeatedly
- No visual feedback: You can’t see changes in real-time
- Trial and error: Finding the perfect blur intensity, opacity, and border values takes countless iterations
- Browser testing: Manual checking across different browsers for compatibility
- Color adjustments: Changing RGBA values without visual preview is frustrating
- No presets: Starting from scratch every single time
This traditional workflow could easily take 30–60 minutes (or more) just to get one glass card looking right. Then multiply that by every component in your design system.
The Modern Way: Create Glassmorphism in Seconds with KineTools
Here’s where KineTools Glassmorphism Generator completely transforms your workflow. Instead of writing code blindly, you get a powerful visual editor that generates perfect glassmorphism effects instantly.
Why KineTools is the Ultimate Glassmorphism Solution
KineTools isn’t just another code generator — it’s a complete design system built specifically for modern UI creation. Here’s what makes it exceptional:
Instant Visual Preview: See your glassmorphism effects in real-time as you adjust properties. No more code-save-refresh cycles. Every change you make appears instantly in the live preview, showing exactly how your glass element will look in production.
Zero Coding Required: You don’t need to know CSS, RGBA values, or backdrop-filter syntax. KineTools provides intuitive visual controls that anyone can use — from beginners to expert developers. Drag sliders, pick colors, and watch the magic happen.
Professional Presets Library: Start with expertly designed glass effect presets created by professional designers. Choose from subtle corporate styles, vibrant creative effects, or minimalist modern looks. Each preset is production-ready and customizable.
Copy-Paste Ready Code: Once you’ve created the perfect glass effect, click one button to copy clean, optimized CSS code. The code includes browser prefixes, proper formatting, and is ready to paste directly into your project.
Saves Hours of Work: What used to take 30–60 minutes now takes 30–60 seconds. That’s a 60x time savings on every glass component you create. Over a project, this adds up to days of saved development time.

Complete Control: Every Glassmorphism Property at Your Fingertips
KineTools gives you precise control over every aspect of glassmorphism effects:
Glass Properties Panel
Background Blur Intensity: Adjust the backdrop-filter blur from subtle (2px) to intense (30px+) using an intuitive slider. See the frosted glass effect strengthen or soften in real-time. The sweet spot for most designs is 8–16px, and KineTools makes finding your perfect blur effortless.
Transparency & Opacity Control: Fine-tune background opacity with precision. The visual slider lets you adjust transparency from fully transparent (0%) to nearly opaque (100%). Most professional glass effects use 10–40% opacity — KineTools shows you exactly how each value looks against your background.
Border Width & Style: Control border thickness from hairline-thin 0.5px to bold 5px+ borders. Toggle between solid, dashed, or dotted border styles. The visual editor shows exactly how borders define your glass elements against different backgrounds.
Border Radius Control: Create sharp-cornered modern cards or smooth rounded glass elements. Adjust corner radius from 0px (sharp corners) to 50px+ (pill-shaped elements). Control each corner individually or all corners together for perfect symmetry.
Shadow Depth & Spread: Add depth with customizable box shadows. Adjust shadow blur, spread, offset, and color. Create subtle floating effects or dramatic depth — all with visual feedback showing exactly how shadows enhance your glass elements.

Colors Panel
Background Color Picker: Choose any background color using an intuitive color picker. Set RGBA values visually without memorizing color codes. The generator automatically calculates proper transparency values for optimal glassmorphism effects.
Border Color Selection: Select border colors that complement your design. Try bright highlights for vibrant designs or subtle grays for professional corporate looks. Preview how different border colors interact with transparency and blur effects.
Shadow Color Customization: Match shadow colors to your design system or create custom atmospheric effects. Adjust shadow opacity separately for precise control over depth perception.
Advanced Options
Padding & Spacing: Set internal padding for content inside glass containers. Preview how text and elements sit within your glass cards with accurate spacing visualization.
Responsive Preview Modes: See how your glassmorphism effects look on desktop, tablet, and mobile screens. Ensure your glass elements remain beautiful and functional across all device sizes.
Background Pattern Options: Test your glass effects against gradients, solid colors, or image backgrounds. This ensures your glassmorphism works beautifully in your actual design context.
The KineTools Workflow: 3 Simple Steps
Creating professional glassmorphism effects with KineTools is ridiculously simple:
Step 1: Choose a Preset or Start Fresh: Browse the preset library and pick a starting point that matches your vision. Or start with a blank canvas and build from scratch. Either way, you’re seeing results immediately.
Step 2: Customize with Visual Controls: Adjust blur intensity, transparency, borders, radius, and colors using intuitive sliders and color pickers. Every change appears instantly in the live preview. Experiment freely — you can always reset to the preset or previous values.
Step 3: Copy Your Code: Click the “Copy CSS” button and paste the code directly into your project. The code is clean, commented, and includes all necessary browser prefixes. No editing required — it just works.
Total time: 30–60 seconds. That’s the KineTools advantage.
Real-World Comparison: KineTools vs Manual Coding
Let’s see a practical example of the time savings:
Traditional Manual Method (45–60 minutes)
- Write initial CSS code (5 mins)
- Adjust blur values through trial and error (10 mins)
- Fine-tune opacity and transparency (8 mins)
- Test different border widths and colors (10 mins)
- Adjust border radius for different elements (5 mins)
- Add and configure shadows (7 mins)
- Test across different backgrounds (8 mins)
- Add browser prefixes and optimize code (5 mins)
Total: ~58 minutes for ONE glass component
KineTools Method (30–60 seconds)
- Open KineTools Glassmorphism Generator (5 secs)
- Choose a preset or adjust sliders visually (20 secs)
- Copy production-ready code (5 secs)
Total: ~30 seconds for ONE glass component
Time saved per component: 57 minutes Over a 10-component project: 9.5 hours saved Over your career: Hundreds of hours saved
Beyond Glassmorphism: The Complete KineTools Platform
While the Glassmorphism Generator is powerful, it’s just one of 20+ professional design tools available on KineTools. Here’s how KineTools can transform your entire design workflow:
Visual Design Tools
Gradient Generator: Create stunning CSS gradients with visual controls. Linear, radial, and conic gradients with unlimited color stops.
Shadow Generator: Design perfect box shadows and text shadows. Layer multiple shadows for complex depth effects.
Border Radius Generator: Create complex border radius patterns. Control each corner independently for unique shapes.
Color Palette Generator: Build harmonious color schemes. Extract colors from images or generate schemes from a base color.
Also Read: Kinetools: Free Online Design & Developer
Animation & Effects Tools
Animation Generator: Create CSS animations and keyframes visually. Preview animations in real-time and adjust timing functions.
Hover Effects Library: Browse and customize pre-built hover effects. Copy code for buttons, cards, and interactive elements.
Transition Generator: Fine-tune CSS transitions with visual controls. Perfect timing and easing functions every time.
Layout & Structure Tools
Flexbox Generator: Master CSS Flexbox with visual controls. See layout changes instantly as you adjust properties.
Grid Generator: Create complex CSS Grid layouts visually. Define rows, columns, and gaps with simple controls.
Spacing Generator: Calculate consistent spacing systems. Generate margin and padding utilities for your design system.
Developer Utilities
Code Formatter: Beautify and format CSS, HTML, and JavaScript code instantly.
Color Converter: Convert between HEX, RGB, HSL, and other color formats.
Unit Converter: Convert px, rem, em, vh, vw, and other CSS units.
The KineTools Advantage: Why It’s Essential for Modern Designers
Speed: Create in seconds what used to take minutes or hours
Visual: See changes instantly — no blind coding
Professional: Production-ready code with browser compatibility
Presets: Start with expert-designed templates
Free: Full access to all tools, no credit card required
Browser-based: No installation, works anywhere
Responsive: Preview on all device sizes
Regular Updates: New tools and features added constantly
Step-by-Step: Creating Your First Glassmorphism Effect with KineTools
Let’s walk through creating a stunning glass card for a landing page hero section:
1. Open the KineTools Glassmorphism Generator: Navigate to https://kinetools.com/glassmorphism-generator/ in your browser. No sign-up required, start creating immediately.
2. Choose a Starting Point: Click “Glass Presets” and browse the library. For a hero section, try the “Vibrant Glass” preset. Click it, and watch the live preview update instantly.
3. Customize the Blur: The preset might have 12px blur. For a more subtle effect, drag the “Background Blur” slider to 8px. See the change immediately in the preview.
4. Adjust Transparency: The background opacity might be 20%. For slightly more visibility of the background, adjust to 15% using the opacity slider.
5. Refine the Border: Increase the border width to 2px for better definition. Change the border color to a lighter shade using the color picker for a luminous edge effect.
6. Perfect the Border Radius: Set border radius to 20px for modern, smooth corners that feel premium and polished.
7. Add Shadow Depth: Adjust the box shadow to add floating depth. Increase shadow blur to 24px and set a subtle offset for a natural lift effect.
8. Test Against Your Background: Upload or select a gradient background similar to your actual landing page. Verify your glass effect looks perfect against your real design context.
9. Copy Your Code: Click “Copy CSS” and paste it directly into your stylesheet. Done! Your professional glassmorphism effect is ready.
Total time: 45 seconds.
Advanced Tips: Getting the Most from KineTools
Tip 1: Save Your Favorite Combinations
Once you create a glass effect you love, bookmark the URL or save the CSS code snippet. KineTools lets you quickly recreate successful designs for future projects.
Tip 2: Use Presets as Starting Points
Never start from scratch. Always begin with a preset close to your vision, then customize. This workflow is 3x faster than building from zero.
Tip 3: Test Multiple Variations Quickly
Create 5–6 variations in under 2 minutes by adjusting one property at a time. Show options to clients or team members for quick feedback.
Tip 4: Combine with Other KineTools
Use the Gradient Generator to create perfect backgrounds, then design glass effects on top. Use the Shadow Generator for custom shadow effects not available in the glassmorphism tool.
Tip 5: Export for Design Systems
Create a library of glass effect variations for your design system. Document the CSS from KineTools in your component library for consistent usage.
Real-World Use Cases: Where KineTools Shines
Use Case 1: Agency Client Work
Agencies need to deliver fast without sacrificing quality. KineTools lets designers create multiple glassmorphism mockup variations during client calls. Clients see options in real-time, approve faster, and projects move forward immediately.
Use Case 2: Startup Product Development
Startups need MVPs yesterday. KineTools eliminates design bottlenecks. Founders and non-designer developers can create professional UI elements without hiring expensive specialists or spending weeks learning CSS.
Use Case 3: Freelance Design Projects
Freelancers bill by the hour or project. KineTools dramatically increases billable efficiency. Complete glassmorphism implementations 60x faster, take on more clients, and increase revenue without working longer hours.
Use Case 4: Learning and Education
Students and bootcamp learners struggle with complex CSS. KineTools provides a visual way to understand glassmorphism properties. See how each setting affects the outcome, accelerating learning and building confidence.
Use Case 5: Design System Creation
Design teams building component libraries need consistency. KineTools ensures every glass element uses the same perfect formula. Export code, document in Figma or Storybook, and maintain design system integrity.
Common Glassmorphism Mistakes KineTools Helps You Avoid
Mistake 1: Excessive Blur
Too much blur creates muddy, unclear elements. KineTools’ visual preview immediately shows when blur is excessive. The presets use professionally tested values — trust them or adjust slightly.
Mistake 2: Poor Contrast
Manual coding often results in unreadable text. KineTools’ live preview shows exactly how text looks on glass backgrounds. If you can’t read it in the preview, adjust transparency or background colors immediately.
Mistake 3: Browser Compatibility Issues
Forgetting -webkit-backdrop-filter breaks effects in Safari. KineTools automatically includes all necessary prefixes in the generated code. Zero compatibility issues—the code just works everywhere.
Mistake 4: Inconsistent Styling
Creating glass effects manually leads to inconsistent blur, opacity, and borders across components. KineTools maintains consistency. Use the same settings or presets across your project for cohesive design.
Mistake 5: Overuse of Effects
Designers often apply glassmorphism everywhere, overwhelming interfaces. KineTools makes creation so easy you might be tempted to overdo it. Remember: use strategically for cards, modals, navigation, and feature highlights only.
The Future of UI Design Tools: Why KineTools Leads
Design tools are evolving beyond Photoshop and Figma. The future belongs to specialized, browser-based utilities that solve specific problems instantly. KineTools represents this future.
Why browser-based tools win:
- No installation or updates
- Work on any device, anywhere
- Instant collaboration and sharing
- Always up-to-date with web standards
- Free or affordable pricing
Why KineTools specifically:
- Specialized expertise: Built by designers for designers
- Comprehensive ecosystem: 20+ tools covering every design need
- Continuous innovation: New tools and features added regularly
- Community-driven: Feedback shapes development priorities
- Production-focused: Every tool generates real, usable code
How KineTools Saves You Money
Let’s calculate the ROI of using KineTools:
Scenario: Agency creating a client landing page
- 5 glassmorphism components needed
- Traditional method: 3 hours total (36 minutes per component × 5)
- KineTools method: 5 minutes total (1 minute per component × 5)
- Time saved: 2 hours 55 minutes
At $75/hour designer rate:
- Cost savings per project: $218.75
- Over 20 projects per year: $4,375 saved
- Over 5 years: $21,875 saved
Plus additional benefits:
- Faster client delivery = happier clients = more referrals
- More projects completed in same timeframe = higher revenue
- Reduced designer burnout from tedious manual work
- Higher quality, consistent results across all projects
Cost of KineTools: $0 (completely free)
The ROI is infinite. Every minute using KineTools is money saved or earned.
Getting Started with KineTools Today
Ready to revolutionize your design workflow? Here’s how to start:
Step 1: Bookmark KineTools Visit: https://kinetools.com/ and bookmark it. Make it part of your daily design toolkit.
Step 2: Explore the Glassmorphism Generator: Head to https://kinetools.com/glassmorphism-generator/ and create your first glass effect. Spend 5 minutes experimenting with presets and controls.
Step 3: Integrate into Your Next Project: The next time you need a glass effect, skip manual coding. Use KineTools. Experience the speed and quality difference firsthand.
Step 4: Explore Other Tools: Browse the 20+ other tools available. Gradient Generator, Shadow Generator, Animation Tools — each one solves a specific design challenge instantly.
Step 5: Share with Your Team: If KineTools saves you time, it’ll save your team time. Share the platform with colleagues, design teams, and developer partners.

Conclusion: Transform Your Design Workflow Today
Creating stunning glassmorphism effects doesn’t have to be complicated, time-consuming, or frustrating. With KineTools Glassmorphism Generator, you get professional results in seconds — not hours.
Stop wasting time writing CSS blind. Stop the endless cycle of code-save-refresh. Stop settling for “good enough” because perfect takes too long.
Start using KineTools and experience:
- 60x faster creation speed
- Real-time visual feedback
- Professional presets and templates
- Production-ready code instantly
- Completely free, no limitations
Whether you’re a seasoned developer, aspiring designer, agency team, or solo freelancer, KineTools gives you superpowers. Create modern, beautiful glassmorphism effects that wow clients, delight users, and elevate your design portfolio.
Ready to revolutionize how you create glassmorphism effects?
👉 Try KineTools Glassmorphism Generator now: https://kinetools.com/glassmorphism-generator/
👉 Explore all 20+ design tools: https://kinetools.com/
Don’t let manual coding slow you down. Join thousands of designers who’ve already made the switch to faster, smarter design workflows with KineTools.
Your next stunning glassmorphism effect is just 30 seconds away. Start creating now.
What is KineTools and is it really free?
KineTools is a comprehensive platform offering 20+ design and development tools built specifically for modern web creators. The glassmorphism generator and all other tools are completely free to use — no credit card required, no hidden fees, no account creation necessary. Just visit the website and start creating.
How does KineTools Glassmorphism Generator differ from other tools?
KineTools provides the most comprehensive control over glassmorphism properties with instant visual preview. Unlike basic generators, KineTools offers professional presets, precise control over every property (blur, opacity, borders, radius, shadows), real-time preview against custom backgrounds, and clean production-ready code with browser prefixes included automatically.
Do I need coding knowledge to use KineTools?
Absolutely not! KineTools is designed for designers and developers of all skill levels. The visual interface uses intuitive sliders, color pickers, and controls that anyone can understand. You don’t need to know CSS, RGBA values, or backdrop-filter syntax. Just adjust visually, then copy the code generated for you.
Can I use KineTools-generated code in commercial projects?
Yes! All code generated by KineTools is free to use in personal and commercial projects without restriction. There are no licensing fees, attribution requirements, or usage limits. Copy the code and use it in client work, products, or any project.
What browsers support the glassmorphism effects created with KineTools?
KineTools generates code compatible with all modern browsers including Chrome, Safari, Firefox, Edge, and Opera. The generated CSS includes necessary vendor prefixes (-webkit-backdrop-filter) for maximum compatibility. The effects work on desktop and mobile browsers that support backdrop-filter property.
How much time can I actually save using KineTools?
Most designers report saving 30–60 minutes per glassmorphism component compared to manual coding. Over a typical project with 5–10 glass elements, that’s 2.5 to 10 hours saved. Over a year of projects, hundreds of hours. The time savings compound significantly for agencies and teams working on multiple projects simultaneously.
What other tools does KineTools offer besides glassmorphism?
KineTools provides 20+ tools covering all aspects of web design: Gradient Generator, Shadow Generator, Border Radius Generator, Color Palette Tools, Animation Generators, Flexbox and Grid Generators, Hover Effects Library, Code Formatters, and many more. Each tool follows the same principle: visual controls, instant preview, production-ready code.
Can I suggest new features or tools for KineTools?
Absolutely! KineTools is community-driven and constantly evolving based on user feedback. If you have ideas for new features, tools, or improvements, the development team actively listens and implements popular requests. Your input shapes the platform’s future.
Subscribe for Newsletter